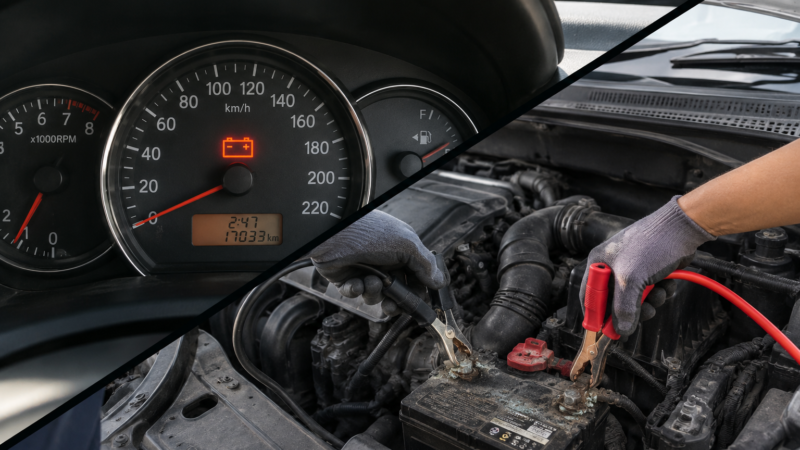
Last Tuesday, a mom sat crying in my waiting area. Her minivan was packed for a beach trip, the battery was dead, and worst of all—the $300 “pro detailing” she’d paid for two weeks ago had left her leather seats sticky and her cloth seats still covered in Cheerio crumbs.
I jumped the battery in 15 minutes. Then I spent 45 minutes showing her how to actually clean those seats the right way.
After 23 years turning wrenches and scrubbing thousands of interiors, I’ve seen every mistake, every overpriced product, and every TikTok hack fail. This is the real deal. Cloth. Leather. Real tools. Real costs. No garbage. Here’s exactly what I did—and what you can do for under $10.
What You’re Really Dealing With (And Why Most Advice Is Wrong)
Here’s the truth nobody tells you about car seats.
Cloth seats are basically giant sponges. They absorb everything. Coffee, soda, sweat, spilled milk, rain from that time you left the window cracked. And what happens to a wet sponge that never fully dries? Mold. Bacteria. That funky smell that makes your kids ask “what died in here?”
Leather seats are tanned animal skin. Sounds fancy, right? But leather has pores. Those pores open up in heat and close up in cold. If you clean them wrong, you’re pushing dirt deeper into those pores. And if you forget to condition them? They dry out, crack, and look like alligator skin after a few summers.
I’ve seen more ruined seats from “gentle” household cleaners than from actual neglect. Mrs. Johnson with her vinegar and baking soda concoctions. Mr. Patel who uses Armor All on everything and wonders why his steering wheel is slippery.
Here’s what I use in my shop. And what you should use at home.
Tools of the Trade: What You Actually Need
Let me be real with you. You don’t need a $600 extractor or fancy ozone machines. But you also can’t clean a car seat with a damp paper towel and hope.
My Must-Have List:
1. A Vacuum With Attachments
Not your household canister vac. Get a $30 Shop-Vac from Home Depot. It’s ugly. It’s loud. It’ll suck up a bag of peanuts from under your seat like nothing. The most important attachment is the crevice tool—that thin, flat nozzle. It’s the only way to get between the seat cushion and the seat back where Cheerios go to die.
2. Microfiber Towels (The Good Ones)
Buy a 24-pack at Costco for $15. Throw away any that feel rough or scratchy. Real mechanics use only the plush, soft ones on interior. The rough ones are for wheels and engine bays. Don’t mix them up. I have a separate color—blue for interior, red for everything else.
3. A Soft-Bristle Brush
Not a toothbrush. Not a wire brush. A proper upholstery brush with synthetic bristles about an inch long. You can get one from Chemical Guys for under ten bucks. Why it matters: stiff bristles fray cloth fibers and scratch leather. Soft bristles lift dirt without damage.
4. The Right Cleaners
For cloth: I use Folex stain remover. It’s twenty bucks a gallon, dilutes 3:1 with water, and I’ve never found a stain it couldn’t kill. Coffee, blood, wine, vomit—I’ve seen it all.
For leather: Lexol cleaner and conditioner. Two separate bottles. Always use both. Cleaner first, conditioner second. Never the combo bottles—they’re garbage.
5. A Spray Bottle with Trigger
The cheap $1 ones from the hardware store. Not the fancy misters. You want a directed stream, not a fine spray, for spot treating stains.
6. Latex Gloves
Your skin will thank me. Some of these cleaners will dry your hands out something fierce.
7. A Wet/Dry Vac or Towels for Drying
If you over-wet cloth seats, you’re screwed. Mold starts in 24 hours in warm weather. You need to get that moisture out fast. Shop-Vac is best. Thick terrycloth towels are second best.
My Personal Pro-Tip Box: Don’t Buy the Cheap Stuff
I see it every week. Some customers bring in their car with dried-out, cracked leather and say, “But I used leather cleaner!”
Then they show me a bottle of Armor All or some generic wipes from the gas station.
Here’s the thing: most off-the-shelf leather “cleaners” are actually just silicone. They coat the surface, make it shiny, and attract more dirt. The real dirt gets trapped between the silicone layer and the leather, rubbing away at the surface every time you sit down.
Spend the extra $10 for proper products. Leather Honey, Lexol, and even Meguiar’s Gold Class are all fine. The twenty-buck combo pack from AutoZone is worth it.
And never, ever use dish soap on leather. That’s the fastest way to strip all the natural oils and turn a beautiful leather seat into cardboard.
The Actual Step-by-Step: How I Clean Car Seats in My Shop
Step 1: Clear Out the Junk (5 Minutes)
I don’t care how clean your car looks. There’s stuff under those seats. Receipts. Old french fries. A missing AirPod. Dog treats. Coins. Half a dozen pens.
Pull everything out. Move the seats all the way forward, then all the way back. Clear out the gap between the seat and center console. I’ve found wallets, phones, and once a $100 bill.
While you’re at it, pull the floor mats. Shake them out. Hose them down if they’re rubber. If they’re carpet, set them aside—we’ll do them after the seats.
Step 2: Vacuum Like Your Life Depends On It (10-15 Minutes)
This is the step everyone rushes. And it’s the most important.
Start with the crevice tool. Go between the seat bottom and back. Go around the seat belt buckle. Go along the edges where the seat meets the plastic trim.
Then switch to the brush attachment. Vacuum the entire seat surface in one direction. Front to back, then side to side. Why? Because if you just random-vacuum, you’re pushing dirt around. One direction lifts the fibers and pulls out what’s trapped.
For cloth seats, take your time at the seams. Dirt collects there like sand in a swimsuit. Run the brush attachment back and forth until you see nothing coming up.
For leather, vacuum gently. The main goal here is getting crumbs out of the stitching. A toothbrush works great for the stitch lines.
My rule: If you’re not getting dust out of the vacuum bag, you’re not done vacuuming.
Step 3: Cloth Seats—The Real Process (20-25 Minutes)
Alright, here’s where we separate pros from amateurs.
Spot Treating Stains:
Mix your cleaner. If you’re using my Folex method: 1 part Folex to 3 parts warm water. Put it in your spray bottle.
Spray directly on the stain. Not too much—just enough to saturate the surface. Let it sit for two minutes. I set a timer on my phone because I’ve learned the hard way what happens when you leave cleaner too long.
Now take your brush. Gently work the cleaner into the stain. Small circles, light pressure. You’re not scrubbing hard. You’re massaging. Pushing the cleaner into the fibers and letting it lift the dirt.
For tough stains—coffee, ink, that mystery stain from your kid’s sippy cup—I use a stronger mix. 1:1 cleaner to water. But never full-strength. That’s asking for color fading.
Tackling Inks and Dyes:
Here’s something most people don’t know. Rubbing alcohol works on ink stains. But here’s the trick: you don’t rub it in. You dab it on with a white microfiber cloth, wait 10 seconds, then blot it off with a dry section of the cloth. Repeat until the ink transfers to the towel. It’ll take 5-6 applications for a ballpoint pen mark.
Pet Stains:
I see these all the time. Dog owners, I love you, but your dogs love to pee on your seats.
For urine stains, use an enzyme cleaner. Nature’s Miracle is the best I’ve found. You need enzymes because they actually break down the proteins in urine. Vinegar just covers the smell temporarily.
Spray the area generously. Let it sit for ten minutes. Blot with a towel until it’s damp, not wet. Then sprinkle baking soda over it. Leave it for a few hours or overnight. Vacuum it up.
The baking soda absorbs the remaining moisture and any lingering odor. I do this in my shop overnight for severe cases. Works like a charm.
Wiping Down the Whole Surface:
Once you’ve spot-treated the problem areas, it’s time for the full surface.
Take a clean microfiber cloth and dunk it in your cleaner solution. Wring it out until it’s just damp. Not dripping. Just damp.
Wipe the entire seat surface in long, overlapping strokes. Don’t scrub. Just wipe. You’re picking up the surface dirt that the vacuum missed.
Then take a dry microfiber cloth and immediately dry the surface. Don’t let it air dry. You want to suck up that moisture before it sinks deeper.
Drying is Non-Negotiable:
This is where people mess up. They think “oh, it’ll air dry” and then come back to moldy seats.
Use your Shop-Vac in reverse to blow air, or even a hairdryer on cool. Keep moving it around so you don’t concentrate heat in one spot. The goal is to get the seat dry to the touch as fast as possible.
In Florida summers? That’s especially critical. I’ve had cars come in where the owner tried to clean seats and the humidity just… never let them dry.
Step 4: Leather Seats—The Gentle Approach (20-25 Minutes)
Leather is easier to clean but easier to ruin. Here’s how I do it.
The Cleaner Application:
Spray your leather cleaner onto a microfiber cloth. Never spray directly on the seat. I’ll say it again because people don’t listen: NEVER SPRAY DIRECTLY ON LEATHER SEATS. The overspray gets in the stitching, between the seat sections, and leads to discoloration.
Wipe the entire seat in straight lines. Why straight lines? So you can see where you’ve been. Circular motions can push dirt into the leather grain.
For the headrests and armrests—the high-touch areas—you might need a second pass. Dead skin cells and body oils build up there.
Dealing with Scuffs:
Black scuffs from shoes or jeans? Use a mild magic eraser. Dampen it slightly and gently rub the scuff. It works like a charm. But be careful—too much pressure and you’ll take off the leather dye.
For deeper scratches, you need a leather dye pen. I keep them in three colors: black, tan, and a universal neutral. They’re fifteen bucks at any auto parts store and can make a scratched seat look new.
The Conditioning Step:
This is the most skipped step and the one that matters most.
After you’ve cleaned and dried the seat, apply conditioner. Again, use a microfiber cloth. A small amount—quarter-sized—is enough for a whole seat.
Spread it evenly in circular motions. Let it sit for a minute. Then buff it off with a clean, dry microfiber cloth. You want a matte finish, not a greasy shine.
In summer, I condition every three months. In winter, every five. Heat and sun are the leather killers. That UV damage is real.
Step 5: The Final Look and Feel (5 Minutes)
Check your work in natural light. The overhead shop lights are fine, but they hide things. Take the car outside or open the door wide.
For cloth seats, run your hand across the surface. Does it feel damp anywhere? Dry it more. Can you still see the stain? One more spot treatment pass.
For leather, check the corners. Did you miss a spot? Is the conditioner evenly spread? Does the seat feel smooth without being slippery?
What I Do In My Garage
You think I bring all my home cars to the shop for detailing? Please. I’m a mechanic. I’m cheap, and I’m busy.
Here’s what I do when my wife threatens to leave if I don’t clean out the minivan:
The 15-Minute Emergency Clean:
Vacuum for five minutes. Spray cleaner on any visible stains. Let it sit while I vacuum the floor mats. Agitate the stains with my brush. Wipe everything down. Run my Shop-Vac over the seats to suck up moisture.
Done. Fifteen minutes for driver and passenger seat. Another ten for the back if the kids made a mess.
The Monthly Deep Clean:
Once a month, I do the full process I described above. Takes about 45 minutes for a full interior. And I never skip the conditioner on leather.
The “Oh Crap, We’re Selling This Car” Clean:
That’s the full nuclear option. I pull the seats out of the car. Flip them upside down. Get the Shop-Vac in the seat rails. I use extractors and fabric shampoos. It’s a four-hour job, but the car ends up smelling and looking factory-new.
My Personal Pro-Tip Box 2: Never, Ever Use These
I’ve been doing this for decades. I’ve seen all the terrible advice online. Let me save you from making the same mistakes:
Bleach on any seat? Never. Even heavily diluted, it’ll cause color loss.
Vinegar on leather? Acid. Leather is basic. You’re literally eating away at the finish.
Wet wipes from Target on leather? Sure, they smell nice. They also dry out leather because of the alcohol content.
Baking soda plus vinegar? That’s just sodium acetate, water, and carbon dioxide. It looks cool when it fizzes. It doesn’t actually clean anything. And now you’ve got wet salty paste soaking into your seats.
Shaving cream as “stain remover”? Please, this isn’t a TikTok hack. It works for some spots because of the soap content, but it leaves a residue that attracts dirt.
When to Tow It to a Pro (Because I’m Honest About My Limits)
I’m a mechanic. I fix things. But I’ll be the first to tell you when you need a professional detailer instead of my shop.
Here’s when you tow it:
1. Biohazard situations.
I’m not cleaning up vomit, blood, or anything from the back of a dog. Those need special sanitization and enzyme treatments. A professional detailer has an ozone generator and extraction equipment. Call them.
2. Mold.
If you see black spots on the seats or smell that musty smell that won’t go away, you have mold in the padding. Cleaning the surface won’t help. The seat needs to be removed, the padding treated, and sometimes replaced. I’ll help you take the seat out, but you need an upholstery pro for that.
3. Oil-based stains on high-end leather.
Think “my wife spilled a whole bottle of sunscreen on the tan leather seats.” That’s a specialist job. The leather needs stripping and reconditioning with professional-grade products. You’ll ruin it trying at home.
4. Luxury brand specialty materials.
Mercedes Nappa leather. BMW Dakota. Alcantara. These are all different. They each require specific cleaners and conditions. You can’t use the same products as on regular leather. I send these to a detailer who specializes in German cars.
5. The whole interior is trashed.
If you just bought a used car and it smells like wet dog and cigarettes, and every seat has stains? Don’t waste your time. Pay a pro to do a full interior restoration. It’ll cost you $300-$500 but will save you hundreds in ruined seats from DIY attempts.
What About the Weird Materials?
I’ve had to research these over the years. Let me give you quick advice:
Vinyl:
Most common in trucks and some SUVs. It’s basically plastic. Super durable. Clean it like leather, but you can be a bit more aggressive with your scrubbing. No conditioner needed.
Alcantara:
This is microfiber suede. Found in high-end sports cars. You need special Alcantara cleaner. Never use water—it’ll leave water marks. Always clean with a dry brush first, then use an Alcantara-specific foam cleaner.
Suede:
Real suede is rare in cars (usually only on headliners). If you have it, it’s delicate. Use a suede brush and eraser. Never get it wet.
The Cost Breakdown (Because We’re All Working Class)
Here’s what you’ll spend doing it yourself:
Initial Investment (One-Time Costs):
- Shop-Vac: $30-$50
- Brushes: $10 for a 3-pack
- Microfiber towels (24-pack): $15
- Spray bottle: $3
Consumables (Per Clean):
- Folex cleaner: $20/gallon, lasts 10-15 cleanings = about $2 per clean
- Lexol cleaner: $12/bottle, lasts 5-6 cleans = about $2 per clean
- Lexol conditioner: $12/bottle, lasts 5-6 cleans = about $2 per clean
- Baking soda: $2, lasts a long time
Total cost per DIY clean: Roughly $6-$10 in product.
What a shop charges:
- Basic interior vacuum and wipe down: $80-$120
- Deep clean with extraction: $150-$250
- Full leather restoration: $300-$500
My math:
You can clean your seats ten times for the cost of one cheap detail. And you’ll do a better job. Most shops rush interiors. It’s a volume business.
The Hidden Edge Cases Nobody Talks About
New Car Smell Is Actually Bad for You:
All those Volatile Organic Compounds? Yeah, they’re not great to breathe. The “new car smell” is off-gassing from adhesives, plastics, and fabric treatments. It fades over time, but a clean interior smells clean, not chemically.
Why Cloth Seats Smell Worse Than Leather:
Cloth absorbs moisture from the air. You live in a humid climate? Your cloth seats are holding water right now. That water supports bacteria growth. The bacteria create smells. Leather doesn’t absorb water the same way, which is why it stays fresher for longer.
Color Matters:
Dark seats show crumbs but hide stains. Light seats show every single stain but are easier to clean because you can see what you’re working on. If you’re buying a used car, avoid tan or beige cloth seats. I’ve seen those look 20 years old after 5 years.
The Driver Seat is Always the Worst:
The driver’s seat takes the most abuse. Sweat, friction from entering and exiting, the pressure of your weight moving when you turn the wheel. The side bolsters on the driver’s seat will always wear out first. Always condition the driver seat more often.
What About Steam Cleaning?
I get asked this a lot. Steam cleaners work. But they’re expensive ($200+) and easy to use wrong. Too much steam and you’re cooking the dirt into the fibers. Most people overcook it. I use steam occasionally, but only on the worst stains and only with my extractor vacuum running simultaneously.
The Tannin Problem:
This is real science. Leather is tanned with chromium salts or vegetable tannins. Heat breaks down these tannins. Every summer, the leather in your car is slowly degrading. That’s why conditioner is not optional—it replaces the oils that are literally boiling off.
My Final Personal Advice
Look, I’ve been doing this for twenty-three years. I’ve seen everything. The guy who used WD-40 to clean his vinyl seats. The woman who put mayonnaise on her leather couch and wondered why it smelled. The teenager with the vaping residue on everything.
Here’s what I’ve learned:
You don’t need to detail your car every week. Once every two months is enough for most people. I use the “finger test”: if I run my finger across the seat and my finger comes back dirty? It’s cleaning time.
Get seat covers if you have kids or dogs. I know, they look ugly. But spending $50 on covers saves your $2,000 leather seats from destruction. I use neoprene covers in my own minivan.
Never eat in the car. I know this is impossible. People eat in their cars. But every spill is a potential stain. If you eat in the car, keep a bag of baby wipes in the glove box and wipe up spills immediately.
When in doubt, call a pro. I’d rather you spend $200 on a detailer than $2,000 on new seat upholstery. And if you’re near my shop in [City], bring it by. I’ll give you a quick look and tell you if it’s a DIY job or not, no charge.
Questions I Get Asked All the Time
How do I get coffee stains out of cloth seats?
How to clean old dried-on ketchup on car seat?
Can I use a carpet cleaner on my seats?
How do I stop my leather of my car seat from cracking?
The Bottom Line
Cleaning car seats isn’t hard. It’s just tedious. Do it right and you’ll save money, keep your car smelling fresh, and actually enjoy getting in it.
Do it wrong and you’ll be back here with me, paying me to fix your mistakes.
Here’s the thing: cars are expensive. Protecting them isn’t. A $30 Shop-Vac and some $15 cleaner will last you through dozens of cleans. That’s cheaper than one professional detail.
So get your supplies. Set aside an hour on Saturday. Put on some music. Clean your seats.
And when you’re done, take a picture. Send it to me. I’ll tell you if you did good or not.
Now get to work. Your car is waiting.